
Introduction :
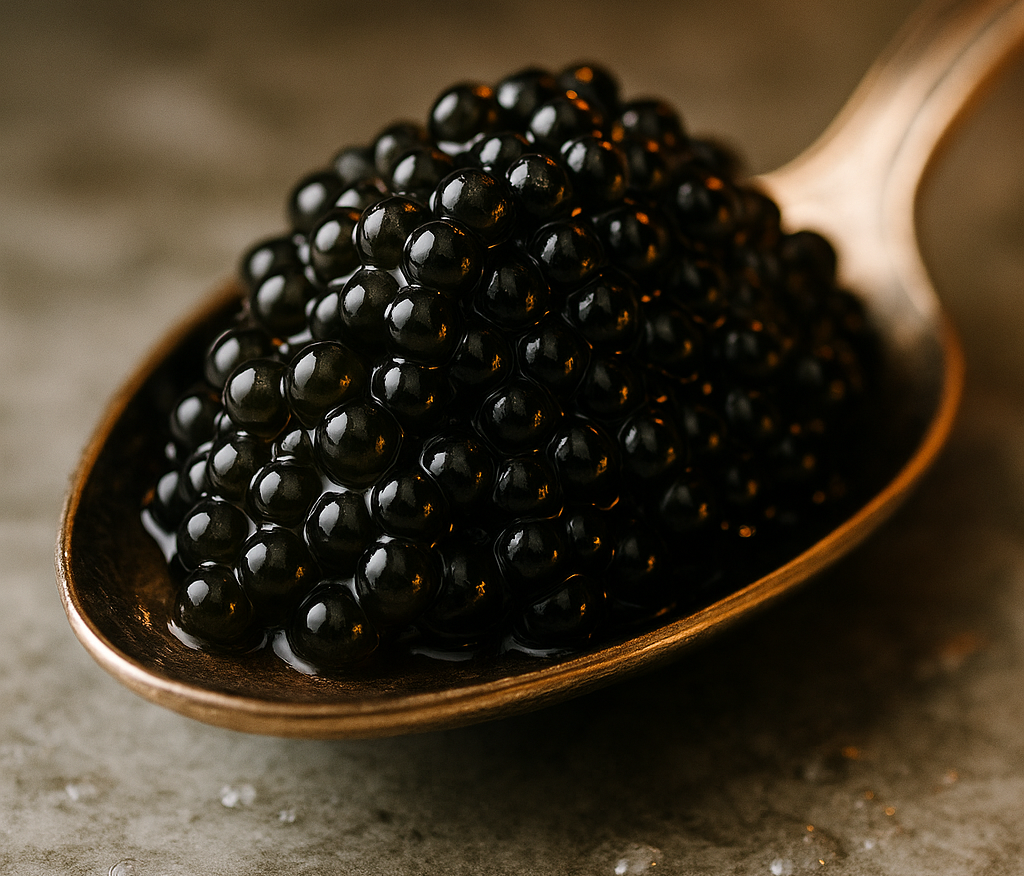
Looking for a luxurious plant-based appetizer that surprises and delights? This vegan caviar recipe is a true showstopper. Using the magic of molecular gastronomy, it transforms humble seaweed and natural ingredients into elegant, pearl-like spheres that burst with umami and ocean flavor.
Unlike traditional caviar, this version is 100% vegan, cruelty-free, and made with sodium alginate and calcium lactate — two natural ingredients often used in fine-dining kitchens. Even better, it’s surprisingly easy to make at home.
Whether you’re hosting a dinner party, crafting a gourmet vegan menu, or simply curious about vegan seafood alternatives, this recipe is a creative and rewarding way to impress your guests — without harming a single fish.


Let’s dive into the process and create pearls of ocean-inspired flavor that look as luxurious as they taste.
🕒 Prep Time: 25 minutes
🍽 Servings: 4
🌱 Difficulty: Easy
💧 Category: Molecular Gastronomy, Vegan Fine Dining
🧂 Ingredients You’ll Need
🌊 For the Seaweed Broth:
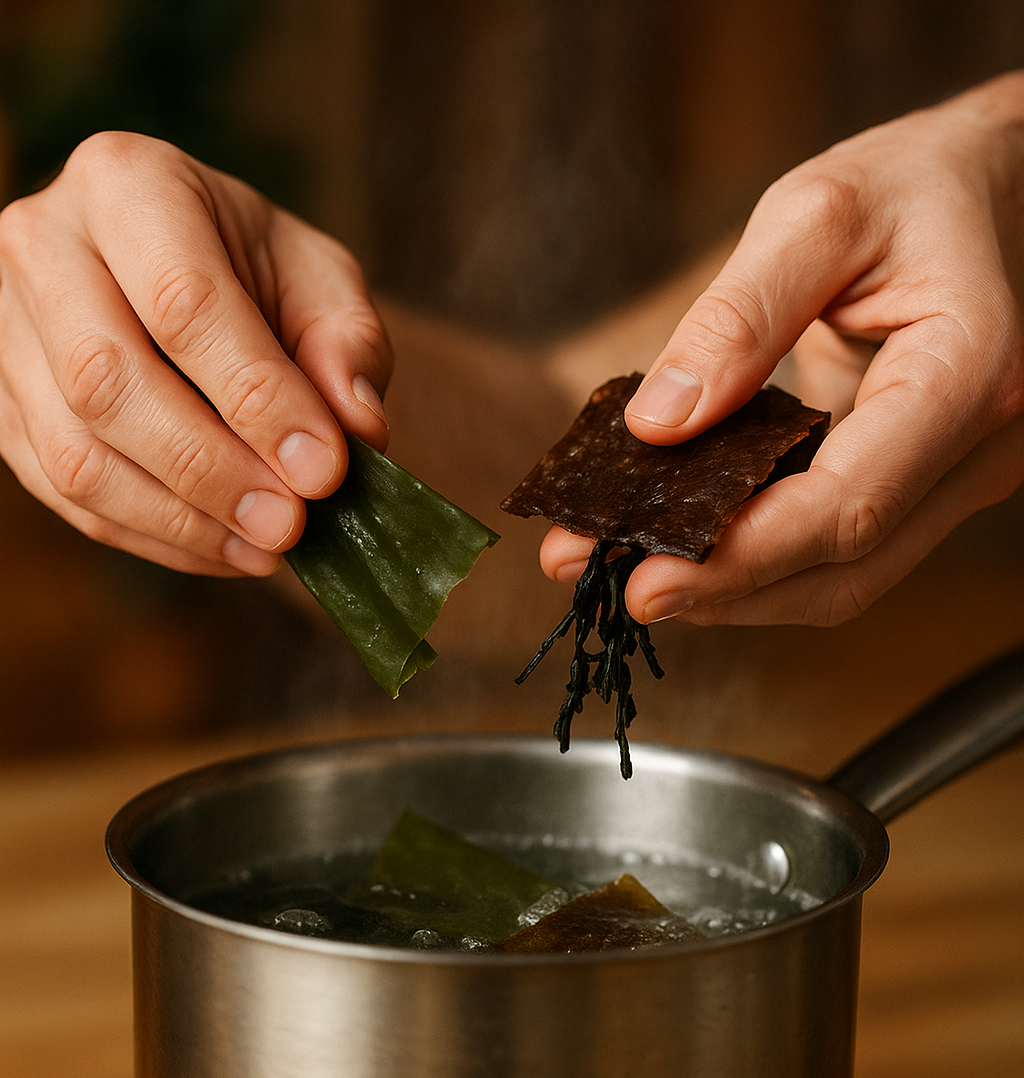
- 1 sheet kombu (dried kelp)
- 1 sheet nori (seaweed)
- 1 tbsp dried wakame algae
- 500 ml water
🍄 For the Flavor Base:
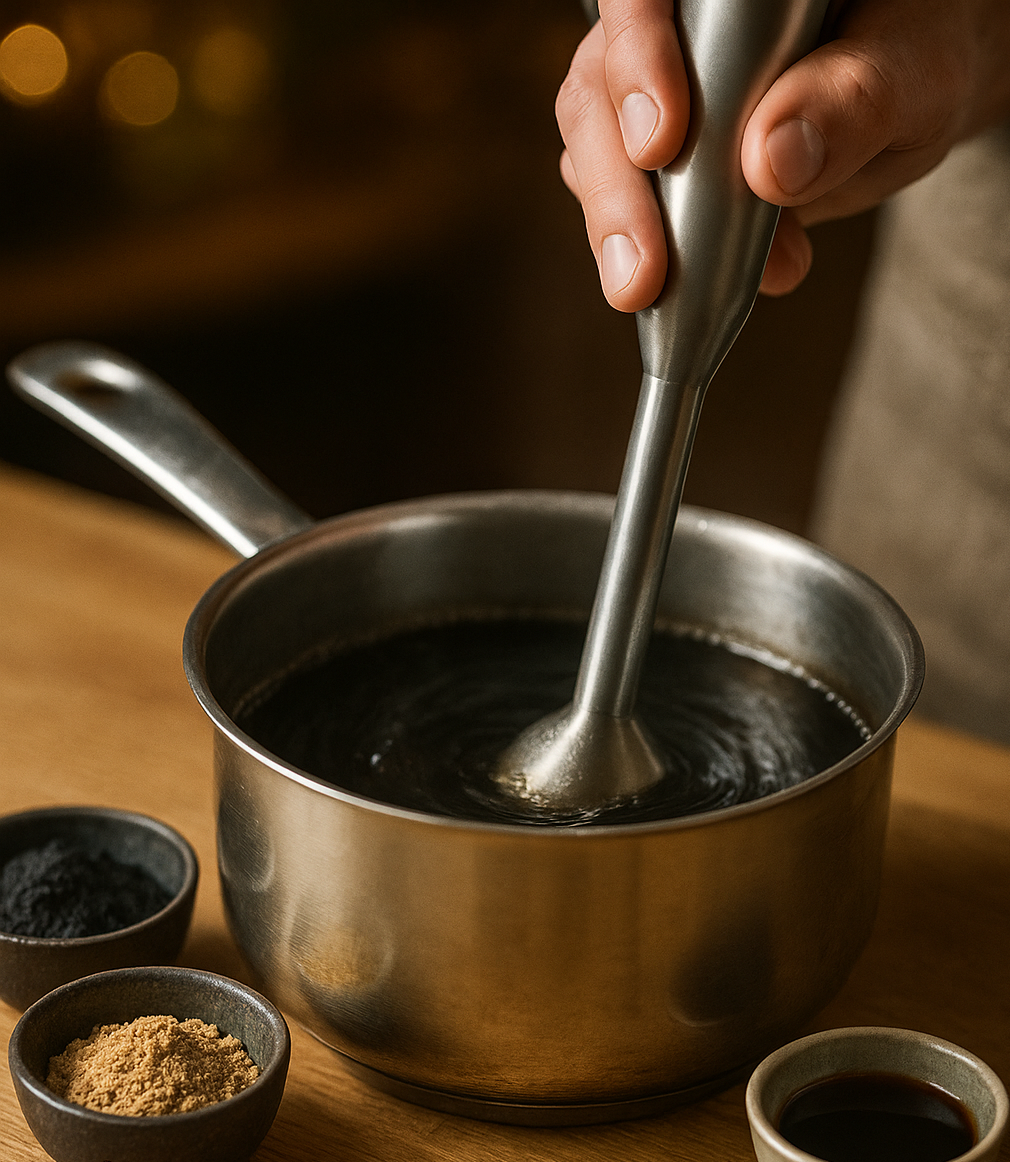
- ½ tsp activated charcoal powder
- ½ tsp mushroom powder (or vegan dashi)
- 1 tsp soy sauce
🧪 For the Caviar Formation:
- 250 ml filtered base mixture
- 2 g sodium alginate
- 500 ml water
- 5 g calcium lactate
🍳 Step-by-Step Instructions
🔹 Step 1: Make the Seaweed Broth
Begin by simmering the kombu, nori, and wakame in 500 ml of water over low heat for about 10–15 minutes.
This draws out a rich, ocean-like flavor.
Once ready, remove from heat and let it cool slightly.
🔹 Step 2: Add Flavor and Color
Strain the broth using a fine sieve.
Next, mix in the activated charcoal, mushroom powder (or dashi), and soy sauce.
Then, blend everything using a hand blender until smooth.
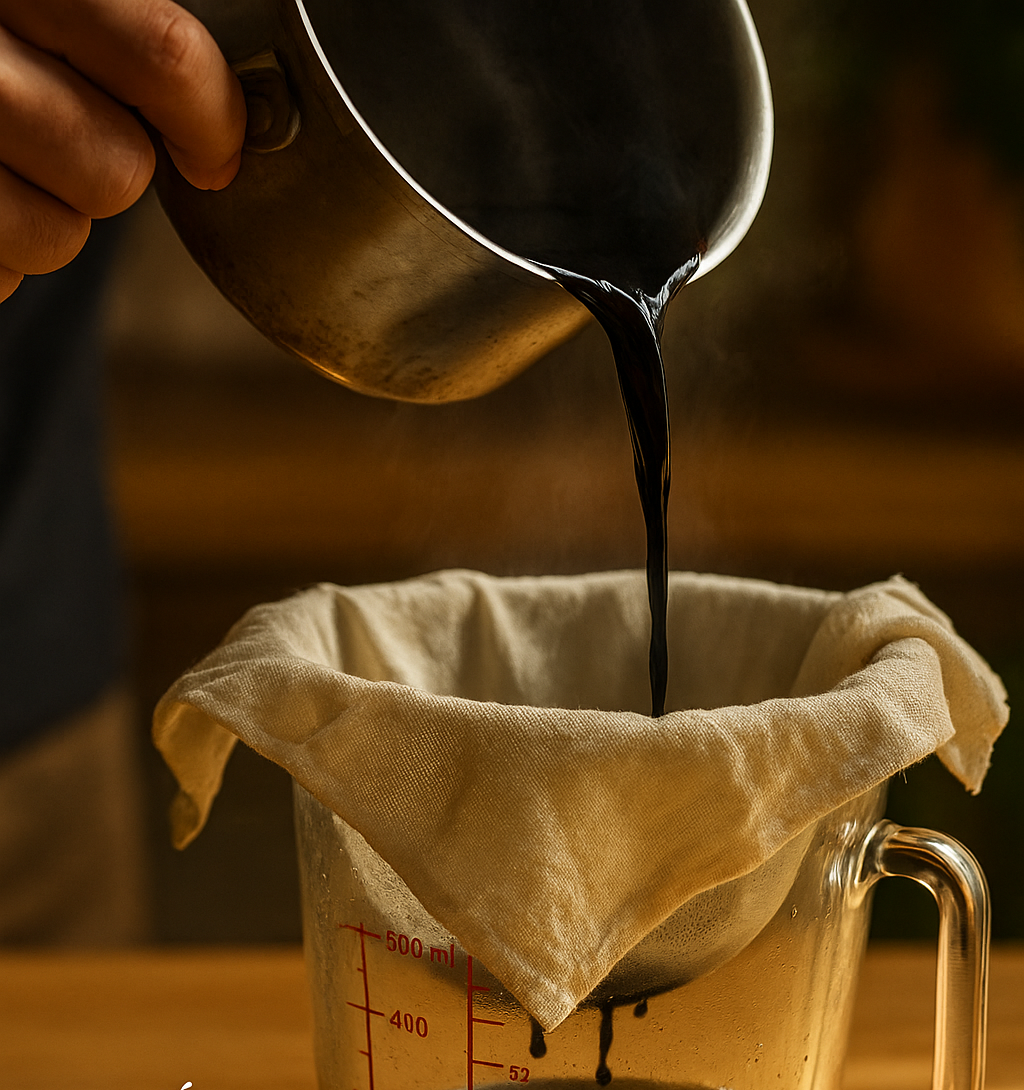
🔹 Step 3: Strain Again for a Silky Base
Now pour the blended mixture through a nut milk bag or fine cheesecloth.
This ensures the base is free of any solids and completely smooth.
You should be left with a dark, aromatic liquid.
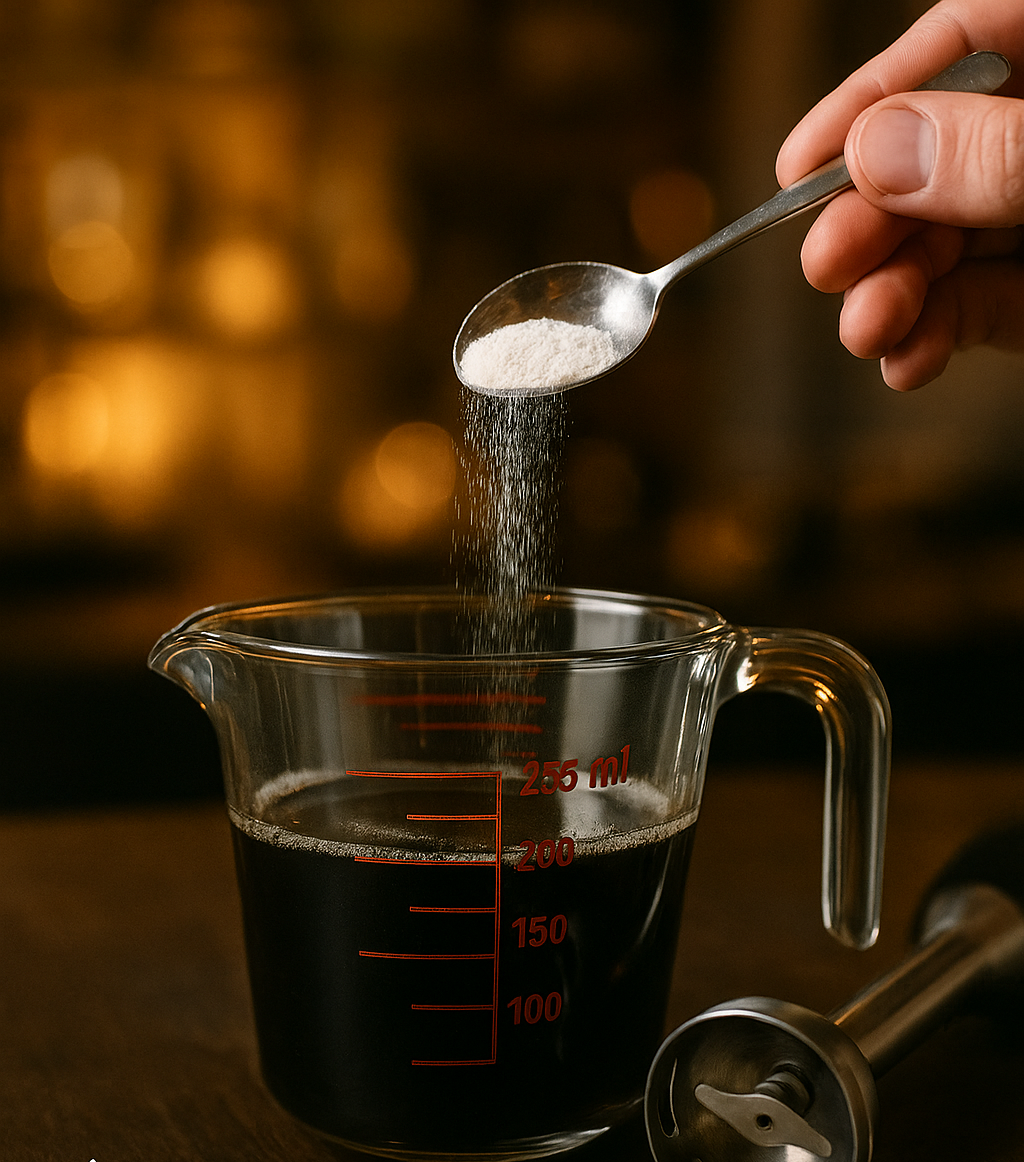
🔹 Step 4: Add the Sodium Alginate
Measure 250 ml of the liquid base and add 2 g of sodium alginate.
Blend thoroughly until fully dissolved.
After that, allow it to rest for a few minutes to remove air bubbles.
🔹 Step 5: Prepare the Calcium Bath
In a clean bowl, dissolve 5 g of calcium lactate into 500 ml of water.
Stir until the powder is completely dissolved.
This bath will help the pearls form properly.
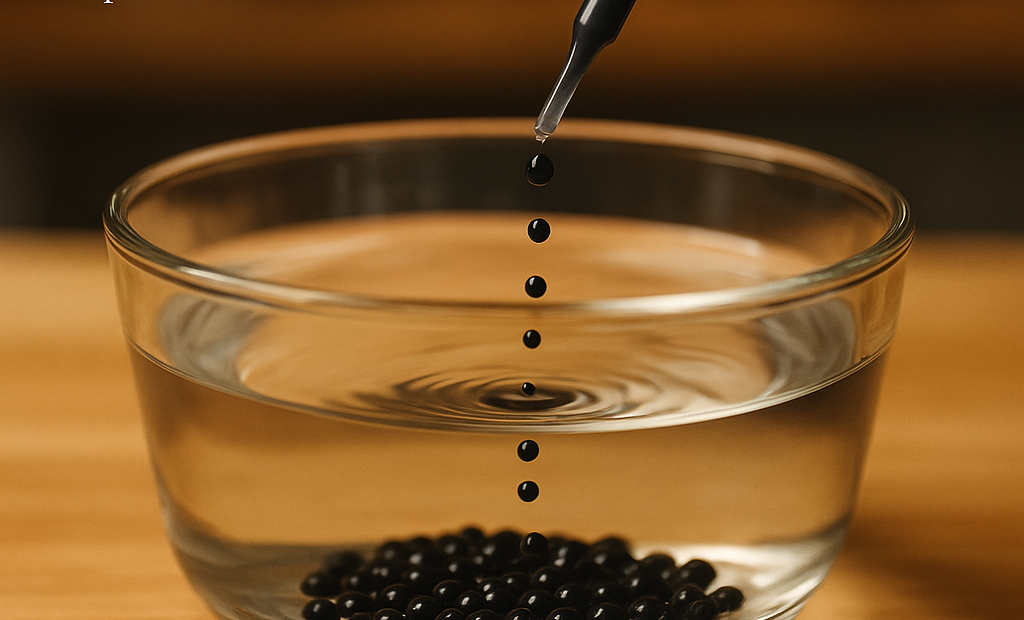
🔹 Step 6: Create the Vegan Caviar Pearls
Fill a pipette, syringe, or squeeze bottle with the alginate mixture.
Carefully drop it into the calcium bath.
Tiny pearls will form right away! Let them sit for about 1–2 minutes.
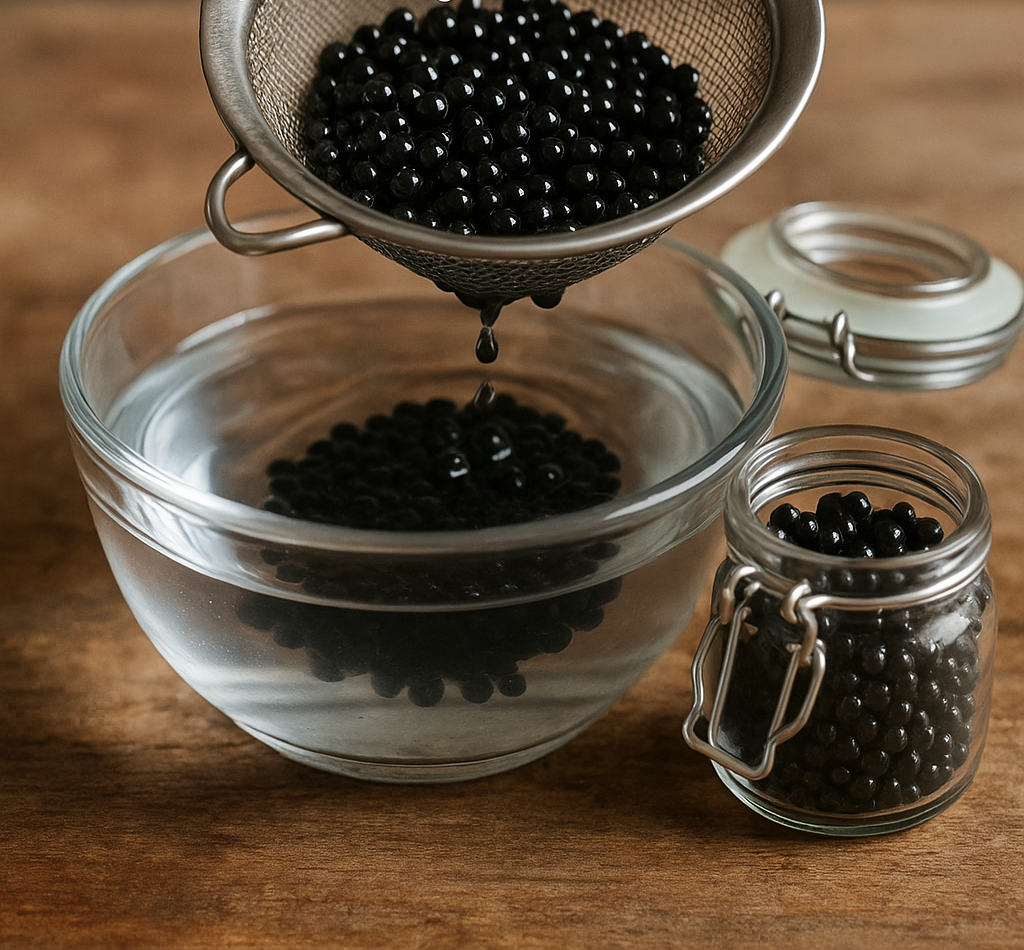
🔹 Step 7: Rinse and Store
Once firm, gently scoop the pearls out using a fine mesh strainer.
Rinse them in cold water to remove any calcium residue.
Finally, store in a sealed container in the refrigerator until serving.
✨ Serving & Storage Tips
- For an elegant look, sprinkle a bit of edible gold dust before serving.
- Add a drop of truffle soy sauce for gourmet flair.
- Always rinse the pearls well to avoid any chalky aftertaste.
- These pearls are best served within 2 days for maximum freshness.
🔍 SEO Keywords to Include
Vegan caviar, plant-based caviar, sodium alginate pearls, vegan molecular gastronomy, caviar alternative, fine dining vegan recipes, seaweed-based vegan seafood, cruelty-free caviar, gourmet vegan food, homemade vegan caviar.
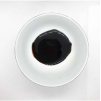
🌿 Vegan Caviar
Description
This elegant vegan caviar is made from seaweed and flavored with soy, mushroom, and activated charcoal, then turned into tiny pearls using sodium alginate and a calcium bath. The result is a gourmet, ocean-inspired garnish perfect for plant-based fine dining. Easy to make, stunning to serve, and completely cruelty-free — a true innovation in vegan molecular gastronomy.
Ingredients:
For the Seaweed Broth:


For the Flavor Base:
For the Caviar Formation:
Instructions:
step 1
Make the Seaweed Broth
Begin by simmering the kombu, nori, and wakame in 500 ml of water over low heat for about 10–15 minutes.
This draws out a rich, ocean-like flavor.
Once ready, remove from heat and let it cool slightly.
Step 2
Add Flavor and Color
Strain the broth using a fine sieve.
Next, mix in the activated charcoal, mushroom powder (or dashi), and soy sauce.
Then, blend everything using a hand blender until smooth.
Step 3
Strain Again for a Silky Base
Now pour the blended mixture through a nut milk bag or fine cheesecloth.
This ensures the base is free of any solids and completely smooth.
You should be left with a dark, aromatic liquid.
Step 4
Add the Sodium Alginate
Measure 250 ml of the liquid base and add 2 g of sodium alginate.
Blend thoroughly until fully dissolved.
After that, allow it to rest for a few minutes to remove air bubbles.
Step 5
Prepare the Calcium Bath
In a clean bowl, dissolve 5 g of calcium lactate into 500 ml of water.
Stir until the powder is completely dissolved.
This bath will help the pearls form properly.
step 6
Create the Vegan Caviar Pearls
Fill a pipette, syringe, or squeeze bottle with the alginate mixture.
Carefully drop it into the calcium bath.
Tiny pearls will form right away! Let them sit for about 1–2 minutes
Step7
Rinse and Store
Once firm, gently scoop the pearls out using a fine mesh strainer.
Rinse them in cold water to remove any calcium residue.
Finally, store in a sealed container in the refrigerator until serving.
Nutrition Facts
Servings 4
- Amount Per Serving
- % Daily Value *
- Sodium 0.92mg1%
- Potassium 0.84mg1%
- Calcium 1 mg
- Magnesium 1 mg
- Chloride 0 mg
* Percent Daily Values are based on a 2,000 calorie diet. Your daily value may be higher or lower depending on your calorie needs.
Note
- For an elegant look, sprinkle a bit of edible gold dust before serving.
- Add a drop of truffle soy sauce for gourmet flair.
- Always rinse the pearls well to avoid any chalky aftertaste.
- These pearls are best served within 2 days for maximum freshness